Combustion Safety Solutions
Rockford Combustion delivers expert combustion safety services, innovative products, and a commitment to safety compliance, helping your organization achieve operational excellence while minimizing risk.
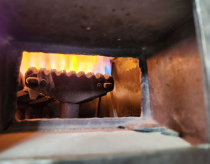
Optimizing Combustion Safety and Performance
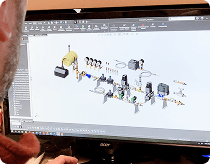
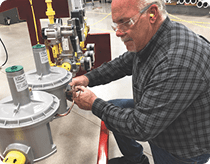
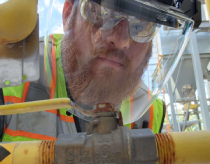
Rockford Combustion offers tailored combustion safety system integrations to improve combustion system safety, efficiency, and compliance. From fuel-train design and installation to ongoing support and risk assessments, our comprehensive approach ensures your systems operate at peak performance. With decades of expertise, we deliver results that protect employees, reduce downtime, and meet regulatory standards.
“I would highly recommend using Rockford as a combustion/burner specialist. Their expertise and problem solving was critical in us achieving our destruction rate necessary for emissions legality. While we had several issues with a large burner manufacturer, who supplied some of the critical burner components, Rockford stayed transparent and made exceptions in their manufacturing processes to accommodate the severity of Loparex’s operations.”
Sr. Global Engineering Project Manager, Large Paper Manufacturer
Services & Solutions Comprehensive Combustion Services for Safety and Efficiency
Explore our specialized services designed to enhance combustion safety, ensure compliance, and optimize performance.


Sr. Global Engineering Project Manager, Large Paper Manufacturer
Training & Education Expert-Led Training for Combustion System Safety and Compliance
Rockford Combustion offers specialized training to equip your team with the knowledge and skills needed to maintain safe and compliant combustion systems. Our combustion experts lead workshops and on-site programs that cover essential topics like NFPA standards, fuel-train safety, and emergency response protocols. Our combustion safety programs ensure your team meets mandatory annual training requirements for NFPA 54, NFPA 85/ASME CSD-1, and NFPA 86, while gaining the knowledge to operate combustion systems safely and efficiently.
NFPA 86 Combustion Safety
Gain in-depth knowledge of NFPA 86 compliance and best practices for combustion safety.
2-Day In-Person Workshop
An immersive, hands-on workshop, in our Rockford, IL training center, providing detailed training on NFPA 86 standards and fuel-train safety.
2-Day Online Workshop
Convenient, self-paced training covering essential NFPA 86 safety and compliance requirements.
Resources Explore Expert Combustion Safety Insights and Tools
Certifications and Partners Building Trust and Driving Safety Excellence Through Industry Standards and Strategic Alliances


Comprehensive Combustion Solutions for Any Industry
Rockford Systems provides combustion solutions tailored to the unique risks and regulations of various industries. From manufacturing to food processing, our expertise ensures compliance and worker protection in high-risk environments.

Aerospace
Supports precision heating processes for manufacturing, testing, and material treatment.
Automotive
Provides combustion solutions for heat treatment, curing, and component manufacturing.

Building Materials
Powers kilns, furnaces, and drying systems for cement, brick, and insulation production

Energy & Utilities
Enhances combustion efficiency in power generation, emissions control, and waste-to-energy applications.

Food & Beverage Processing
Ensures precise thermal management for baking, roasting, drying, and sterilization processes.

Heavy Mobile
Supplies heating solutions for manufacturing heavy-duty equipment and vehicle components.

Industrial Ovens & Furnaces
Improves performance in heat treatment, metal curing, and specialized industrial heating.

Oil & Gas
Provides combustion expertise for refining, processing, and thermal energy applications.

Pulp & Paper Processing
Optimizes combustion for drying, recovery boilers, and energy efficiency.

Steel & Glass
Delivers high-temperature combustion solutions for smelting, forging, and glass manufacturing.
Find Safety Solutions for Your Industry
Contact us to learn how Rockford Combustion can help your organization reduce risk and improve employee safety.
Open Monday – Friday, 8:00am – 5:00pm CST. Same day email support responses.